Create a Sencha Touch WebApp and deploy within a native iOS App
In this post, I want to give a quick walk-through for building a small HTML5/CSS3/JavaScript application and then bundling it into a native iOS App.
If you don’t need to use native iOS features, you better have a look at how to generate a native package for iOS (and Android) with the Sencha SDK Tools here.
But if you want to use native Features of iOS or even want your Sencha Touch App just to be a part of a bigger Application, you have to do this by hand.
This is actually pretty easy, but when I first tried to do this, I’ve encountered some pitfalls.
Prerequisites
In order to follow this post you need the following
Furthermore, I assume that you are at least familiar with some basic usage of the command line.
Create the Xcode Project
So let’s jump right into it. The first step is to create a new Xcode Project for our Application. For demonstration purpose, the ‘Single View Application’ template is sufficient. Our App will be called ‘MyWebApp’ and we choose to create it for iPad only.
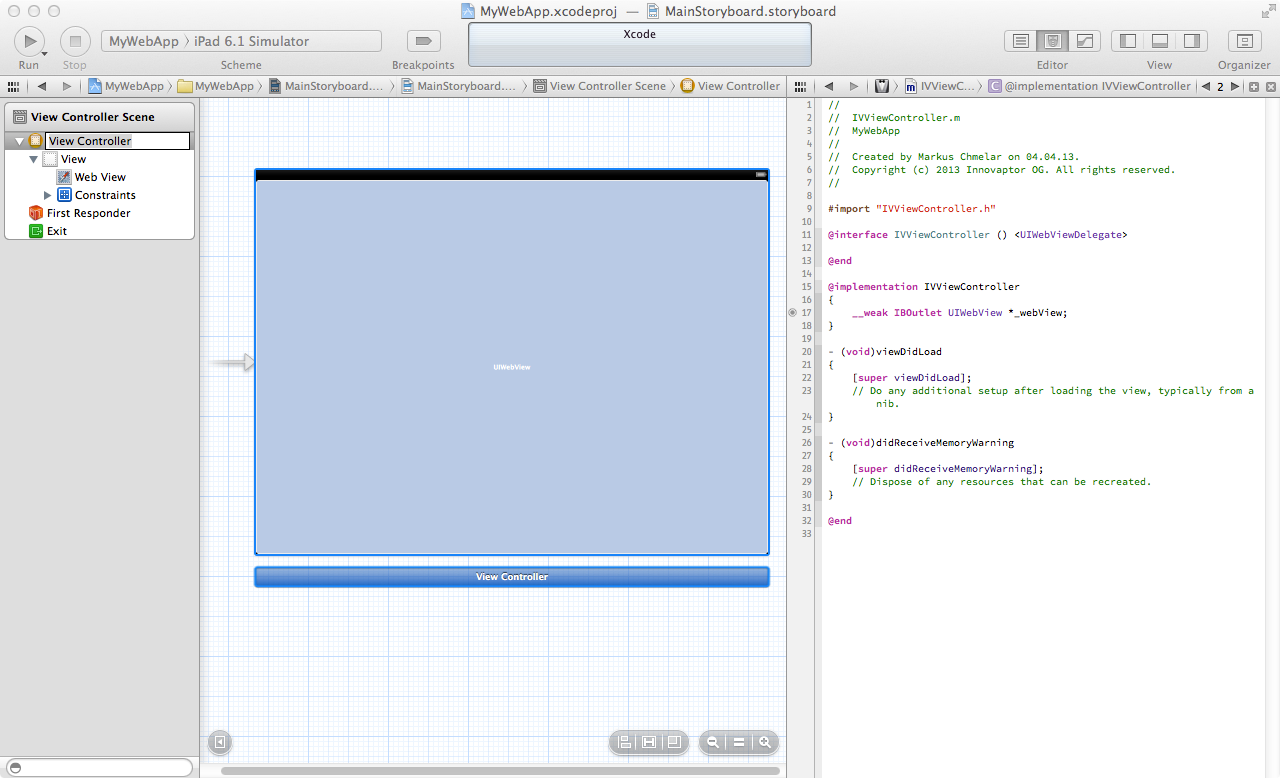
Once the project is created, we open up the MainStoryboard.storyboard, add an UIWebView to the ViewController and connect it to an outlet in the ViewController. This webview will be used later on to load and display our Sencha App. Then, we set the ViewController as a delegate for the UIWebView.
 Storyboard
 Thats it for now in Xcode, lets move on to creating the Sencha app.
Create a Sencha Touch App
To generate a Sencha App with the commandline tool, you first have to navigate into the SDK-Folder in the terminal. There, you can generate the App with the command ‘sencha generate app’. This command takes at least two commands - the name of your app and the path where the app should be created.
Choose to generate the Sencha App in a seperate subfolder of the Project folder called webapp.
sencha generate app MyWebApp ../MyWebApp/webapp
Now you can already take a look at the generated app. Navigate to WebApp/webapp and open index.html in your browser to do so. (Note that for me, the app only works in Safari and not in Chrome or Firefox (on OSX))
Now you could start developing your HTML5 app. But for now this template is sufficient and we can continue to link this webapp into our native iOS App.
(For more information on getting started with Sencha Touch, check out their Getting Started Guide)
Link the WebApp
The basic idea is to load our webapp into the UIWebView, which we have already created. To do so, we first have to copy our webapp into the iOS App Bundle. So lets go back to Xcode and just drag the ‘webapp’ folder in.
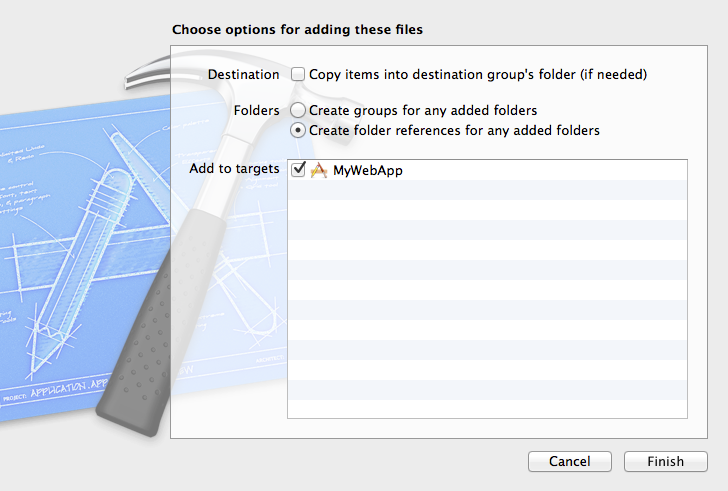
When the import dialog pops up make sure to choose “Create folder references for any added folders”. This is absolutely crucial, because otherwise the folder structure will be flattened in the app-bundle and the webapp won’t work since all relative links are broken. Don’t copy the items, since the webapp is already in the project folder, and check the box to add the folder to your Build target.
 make sure to import the webapp as folder reference
 Note that, by importing the whole ‘webapp’ folder, a lot of files that are not acutally needed are copied. This is fine for development because you don’t have to do additional steps before building now, but for deployment, you should check the ‘Deployment’ section of this post.
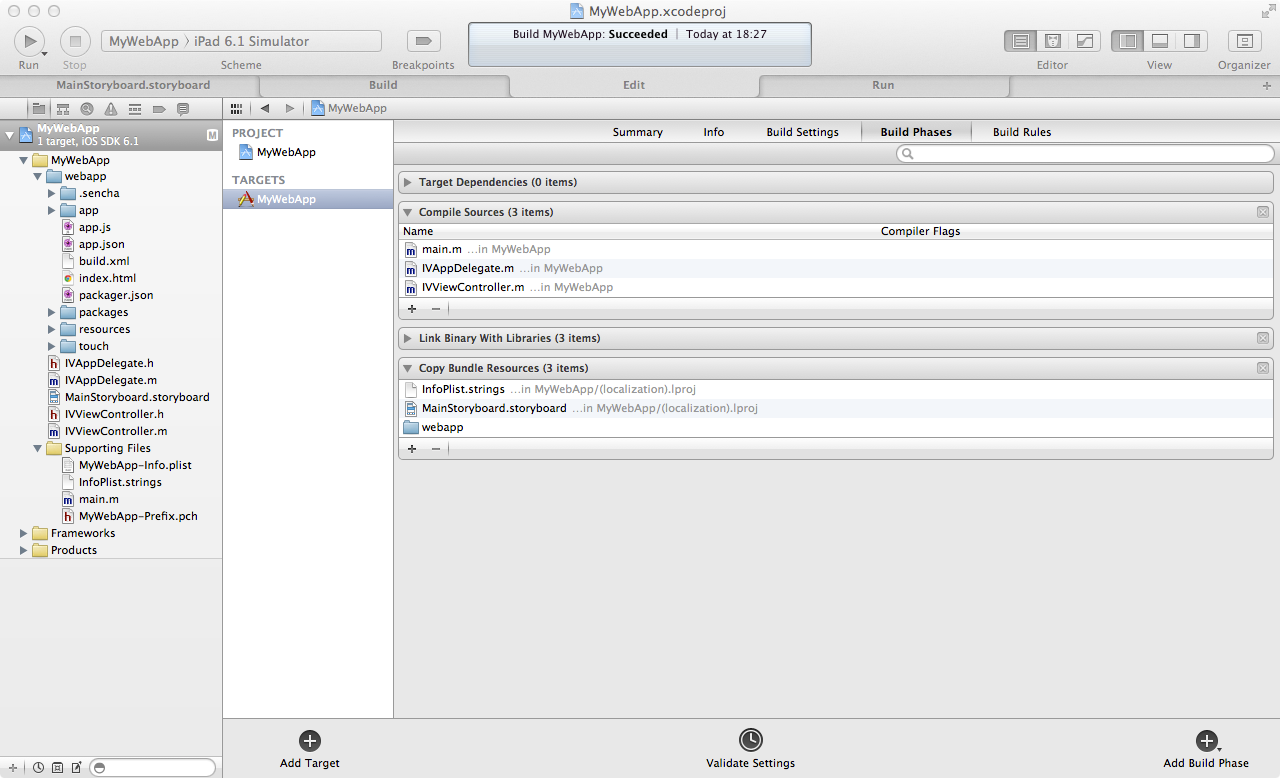
Now, in the ‘Project Navigator’ tab, the webapp folder should have blue-ish folder icons instead of the yellow ones that you get when creating groups. Furthermore, you can make sure that none of the JavaScript (.js) files were added to the ‘Compile Sources’ build phase in the Targets build phase and that only the ‘webapp’ folder shows up in the ‘Copy Bundle Resources’ build phase.
 build phases
 Now, we just have to load the webapp into the webview on startup. Lets go to the ViewController.m and edit the viewDidLoad function accordingly:
- (void)viewDidLoad
{
    [super viewDidLoad];
    // Do any additional setup after loading the view, typically from a nib.

    NSString *webapIndexPath = [[NSBundle mainBundle] pathForResource:@"index"
                                                                   ofType:@"html"
                                                              inDirectory:@"webapp"];
    NSURL *webappUrl = [NSURL fileURLWithPath:webapIndexPath];
    NSURLRequest *request = [[NSURLRequest alloc]initWithURL:webappUrl];
    [_webView loadRequest:request];
}
Attention: It is important to use the [UIWebView loadRequest:] methode because with [UIWebView loadHTMLString:baseURL:] and [UIWebView loadData:MIMEType:textEncodingName:baseURL:] the webapp will not load further than to the startup screen!
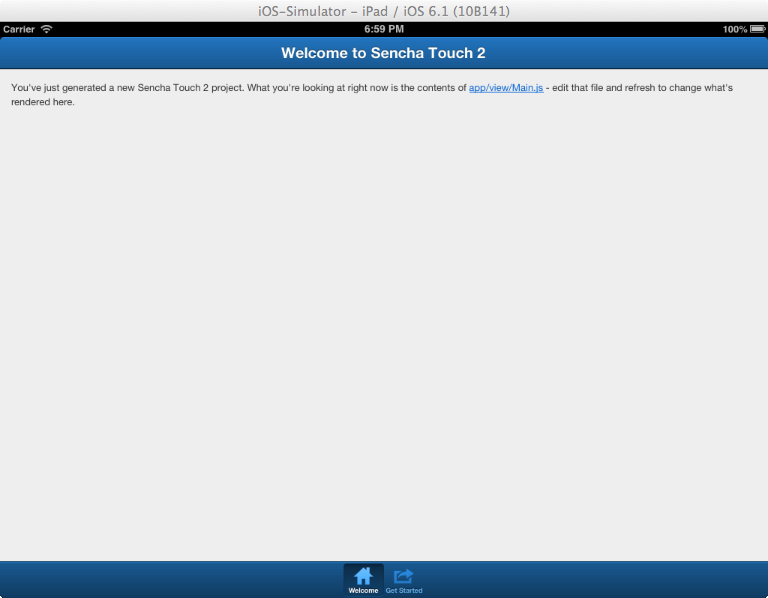
That’s it, compile and run to have look. ;-)
 App in iOS Simulator
 Developing Workflow
Now that everything is set up, you can start developing your webapp. There’s no need to build and run it in Xcode everytime, you can just develop with your browser and don’t have to use it at all as long as you just develop the Sencha application. You only need to come back to Xcode when you need to work on the native part of your application. Since the webapp is included as a folder reference, you don’t even have to touch the project file itself, just hit build&run and the latest version of your webapp will be copied into the app bundle.
Deployment
As mentioned, including the whole ‘webapp’ folder is ok for development but not for production because
- it contains a whole lot of files that you don’t actually need/use in your application.
- the sources are not optimized.
For these reasons, the app is a lot bigger than it needs to be and it loads much slower compared to the optimized version.
Sencha provides a command to generate a production build of you webapp:
sencha app build production ../webapp_production
This command optimizes the sourcecodes for size and performance (e.g. copys all .js files into app.js, removes unncesessary whitespaces, …) and creates a build in the webapp_production folder.
In Xcode, you want to remove the ‘webapp’ folder and include the folder of your production build instead. (Make sure to adjust the path of the index.html that is loaded in the ViewController!)
The reason I don’t use the production build for development is that now, everytime you want to compile, you also have to build the production build of the webapp beforehand, and that acutally takes a lot of time.
In the sample project, I have created a second build target for production which runs the sencha app build command in a run-script phase before copying the app to the bundle. Furthermore, I have created two pre-compiler defines for loading the correct index.url.
Sample Project
I have created a sample project along writing this post, you can get it here and have a look at the complete project.

Markus Chmelar, MSc
Markus is a technical mastermind and one of the founders of Innovaptor. He studied Computer Engineering at Vienna University of Technology and contributes a valuable diversification to Innovaptor's qualifications. Markus is eager to find innovative solutions to complex problems in order to provide products that are tailored directly to the customers' needs


